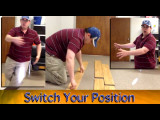
Why Start Installing Laminate Flooring Away From The Wall?

We had some questions come in based on the video at the bottom of the post. In it, Adam starts a laminate installation a few feet away from the wall, then, after a few rows are locked together, pushes it back into place, against the wall's spacers, before continuing on.
We do this so we can work with the laminate properly (you pull planks toward you as you install them), using our own weight on the first few rows of flooring as we install each new plank, then we push it back once there is enough room to continue on without being up against the wall ourselves.
This raised some issues, and Adam gave me these replies:
...Do you connect a few pieces like you did, then put it back towards the wall and start adding and cutting pieces to the ends?
From what I can tell in the question, it is about when to reposition the material to its final installation spot. In the video I have the material about 3-4 feet from the wall to start the installation.
For most starting positions you would have it start in the corner of the room and work all the way across the floor using full planks in the first row. When you get to the end of the first row you will need to cut the last plank to make it fit, and be sure to leave about a 1/4" gap from the wall. Once you've cut that last piece in the row, the remainder of that plank can be used to start the next row.
As you go along, each row needs to be complete, having all planks and partial planks in place, and once you have three, four or five of those done, you can push them back to the wall.
You mentioned leaving 8 inches. Why do you need to leave 8 inches for?
With a click together floor, the end joints in each row need to be at least 8 inches off from the end joints in the adjoining rows because the planks in one row help secure the planks in neighboring rows. If you had your end joints all aligned, right next to each other from row to row such that your floor looked like a grid, you cold unlock those ends as you walked across the floor. The overlap on each side of an end joint helps keep it in place once the whole floor is down.
– – – –
David has written and made videos about flooring products and installation since 2011 at Floors To Your Home (.com), where he is also the PPC Manager, a Researcher, a Website & Marketing Strategy Team member, Videographer, Social Strategist, Photographer and all around Resource Jito. In my spare time I shoot and edit video, put together a podcast, explore film history, and mix music (as in ‘play with Beatles multi-tracks’). Connect with
W. David Lichty
Follow Team Floors To Your Home on Facebook

 Brown Tone
 Unfinished
 Red Tone
 Golden Tone
 Gray Tone
 Light Tone
 Medium Tone
 Dark Tone
 Brown Tone
 Red Tone
 Golden Tone
 Gray Tone
 Light Tone
 Medium Tone
 Dark Tone
 Brown Tone
 Red Tone
 Golden Tone
 Gray Tone
 Light Tone
 Medium Tone
 Dark Tone
 Multi Color
